Tiernan's Comms Closet

Geek, Programmer, Photographer, network egineer…

Currently Viewing Posts Tagged kubernetes

Building Cloud Images for Proxmox

To create an Ubuntu VM for a Kubernetes cluster using Proxmox, follow these steps: download and tweak the base image, sysprep it, create a template with specified configurations, and clone the VM. Adjust settings such as memory, storage, and IP configurations. Fix shared IP issues by resetting the machine ID.

I needed to create a few Ubuntu VMs for a Kubernetes cluster for testing, and I wanted to make the process as simple as possible using Proxmox and some minimal automation. Here’s what I’ve done:

First, Download the base image:

wget https://cloud-images.ubuntu.com/jammy/current/jammy-server-cloudimg-amd64.img

Then, tweak the image. Since I’m using my apt-cacher-ng proxy here, I’ve set the proxy for all VMs. You can remove it or adjust it as needed. If you want to remove it, simply remove the append-line option. Additionally, I’m installing qemu-guest-agent here. You can add any additional items at this point if desired.

sudo virt-customize -a jammy-server-cloudimg-amd64.img --install qemu-guest-agent --append-line '/etc/apt/apt.conf.d/00proxy:Acquire::http { Proxy "http://10.244.71.182:3142"; };'

Sysprepping the image resets it to the default stage. If you don’t perform this step, and you clone the machine multiple times, all the clones will have the same machine ID and IP address. [Note: This isn’t working fully for me. See below for the changes I made to the machine ID.]

sudo virt-sysprep -a jammy-server-cloudimg-amd64.img

Create the template. I used ID 9000 and assigned a name. You can modify this. Additionally, I’ve tagged mine with VLAN 72 (my Kubernetes VLAN). Feel free to change or remove this tag as needed. Furthermore, I set the disk size to add 50GB. Please replace any references to “godboxv2-tank” with your storage name.

sudo qm create 9000 --name "ubuntu-2204-cloudinit-template" --memory 4096 --cores 2 --net0 virtio,bridge=vmbr0,tag=72

sudo qm importdisk 9000 jammy-server-cloudimg-amd64.img godboxv2-tank

sudo qm set 9000 --scsihw virtio-scsi-pci --scsi0 godboxv2-tank:vm-9000-disk-0

sudo qm set 9000 --boot c --bootdisk scsi0

sudo qm disk resize 9000 scsi0 +50G

sudo qm set 9000 --ide2 godboxv2-tank:cloudinit

sudo qm set 9000 --serial0 socket --vga serial0

sudo qm set 9000 --agent enabled=1

sudo qm template 9000

Clone the VM into a new VM.

sudo qm clone 9000 2001 --name k8s-01

sudo qm set 2001 --sshkey godboxv3.pub

sudo qm set 2001 --memory 4096

sudo qm set 2001 --ciuser tiernano

sudo qm set 2001 --ipconfig0 ip=dhcp

Change tiernano and godboxv3.pub to your settings. Modify the names and memory as necessary.

As mentioned earlier, I’m still encountering the issue of IP addresses being shared. To resolve this, log into the boxes and execute the following command:

echo -n > /etc/machine-id

rm /var/lib/dbus/machine-id

ln -s /etc/machine-id /var/lib/dbus/machine-id

Reboot the computer, and the problem should be resolved.
day 10 of #100daysofhomelab

Day 10 of #100daysofhomelab and its mostly updates and monitoring.

I think my next plan for the Kubernetes cluster is to rebuild the VMs and start from scratch. Currently, they ranged from 2-4 cores and 4-8Gb RAM. They also had a single disk on them and used an Ubuntu 22.04 cloud image. I think the plan going forward is to make sure each has similar RAM and Cores, none are going on the smaller VM Hosts I have, and I will be adding a new disk just for storage. Looks like Minio might work for me… More testing and reading are required though.

Day 9 of #100daysofhomelab

Well, day 9 of #100daysofhomelab is about Disaster Recovery… Well, at least the disaster part… Recovery not so much… My Kubernetes cluster, how do I put this… shat the bed… It’s been up and down all day and then the Longhorn storage failed and took my WordPress install with it… I lost yesterday’s post (which isn’t the end of the world) but it’s a pain in the ass… I ended up using the old docker copy of WordPress, so at least that’s online.

So, going to shut down the full cluster and start again… Might be looking at something other than Longhorn for storage… but giving up for the day… I will be back tomorrow.

day 7 of #100daysofhomelab

Day 7 of #100daysofhomelab and just a quick update for today: this site is now running on my Kubernetes Cluster! I am using Cloudflare tunnels for the ingress controller (more on that later) and so far, so good… Most of this was done yesterday, and it was a swap over of the DNS stuff today… been sick most of the day, so that’s all I got in me for day 7…

day 6 of #100daysofhomelab

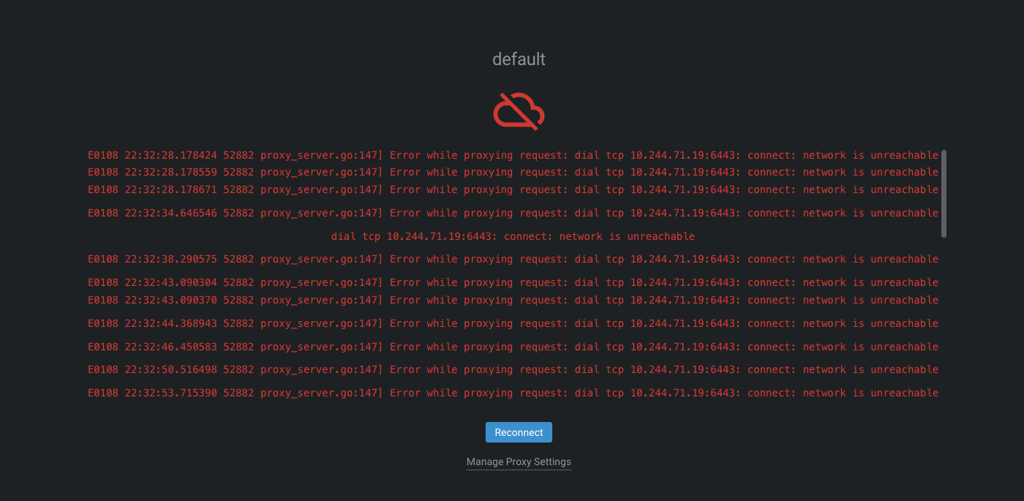
Day 6 of #100daysofhomelab and I have some progress on my Kubernetes cluster!

Then after a few min, it comes back online…

Also, I got WordPress installed in Kubernetes! Now to migrate this blog over… Hopefully before my next update tomorrow…

day 5 of #100daysofhomelab

Day 5 of #100daysofhomelab and its mostly reading… the daddy was in the hospital for the last 2 weeks, including over Christmas day, so tomorrow is Christmas day for us… Turkey, ham and all the usual stuff… So, been busy with that. But have been reading a couple of docs, so some links for today:

That’s about it for today… I’ll be back tomorrow… hopefully…

day 3 of #100daysofhomelab

Day 3 of #100daysofhomelab and more Kubernetes messing today. Haven’t got it working, but messing with it is a start. Some links and notes are below:

I am planning on moving my WordPress install over from my Docker host to Kubernetes in the next few days, so running through the docks from Bharathiraja above, but I keep getting errors related to MySQL… More digging is required. I use Cloudflare Tunnels to secure my WordPress install, so the docs on how to use Cloudflare Tunnels with Kubernetes are important…

Day 2 of #100daysofhomelab

Day 2 of #100daysofhomelab and more messing with Kubernetes… So far, I have built, torn down, rebuilt and torn down a second time… and now building for a third time! Techno Tims Ansible scripts for the Win! A couple of notes for today:

  • the script uses K3s version 1.24.8-k3s1. at some stage yesterday I tried changing this to 1.26.0-k3s1, the latest version from the K3s GitHub page… This was a bad idea. Rancher does not like this, and, well, I don’t know what I am doing, so I want to see what Rancher does…
  • ideally, you would have multiple master nodes, but, me being the lazy git that I am, only set up 1… but it does look like it could be changeable later on…
  • I have a total of 6 VMs running my K3S cluster: 3 are 4 Cores with 8GB RAM running on GodBoxV2, which is now running Proxmox. The other 3 are each running on my HP Micro Server, the Quad 2.5Gb Celeron Box and an 8th Gen Intel NUC… each is given 2 cores and 4GB RAM. That gives me a total of (roughly) 18 cores and 36GB RAM. Each VM has around 50 GB of storage and using Longhorn, I have around 250GB of space (master does not seem to contribute space). Replicas are set to 3, so not quite a full 250GB.
  • Why Kubernetes? Well, I have 2 VMs currently running my fleet of docker containers. I have lost count of how many i actually have. So, my plan is to use Kubernetes to move all them from those single docker boxes, and have them more distributed and more HA. This will allow me to move stuff around easier, or at least i think it will… At the very least, i get to play with new tech! 🙂

More work on the cluster is required. This blog is hosted in-house on one of the docker instances… Hopefully, at some stage, it will be moved to the K3s cluster! That would be the first major move!

Day 1 of #100daysofhomelab

I have decided to start my #100daysofhomelab journey again, so today is day 1. I have been working on a K3s cluster in the house, and so far, I have to start again… going to rebuild it again tomorrow at some stage…

Lots of Links

some notes for myself:

Service Account for Dashboard

to create the Service account, create a file, ca.yml, and enter the following:

apiVersion: v1
kind: ServiceAccount
metadata:
  name: <username>
  namespace: kube-system

next, create a file called cluster-role-binding.yml with the following:

apiVersion: rbac.authorization.k8s.io/v1
kind: ClusterRoleBinding
metadata:
  name: <username>
roleRef:
  apiGroup: rbac.authorization.k8s.io
  kind: ClusterRole
  name: cluster-admin
subjects:
- kind: ServiceAccount
  name: <username>
  namespace: kube-system

make sure username matches!

run the following commands:

kubectl apply -f sa.yml
kubectl apply -f cluster-role-binding.yml
kubectl -n kube-system create token <username>

Installing OpenSCSI and NFS (required for Longhorn) with Ansible

Ansible Script

---
- hosts: k3s
  become: true
  
  tasks:
  - name: Update and upgrade apt packages
    become: true
    apt:
      upgrade: yes
      update_cache: yes
      cache_valid_time: 600 
  - name: install packages
    become: true
    apt: 
      pkg:
      - nfs-common
      - open-iscsi

  - name: Make sure open-iscsi is enabled and running
    ansible.builtin.systemd:
      enabled: true
      state: started
      name: open-iscsi