Tiernan's Comms Closet

Geek, Programmer, Photographer, network egineer…

Currently Viewing Posts in Virtualization

How to Set Up Mac OS 9 on QEMU

Want to experience the classic Apple operating system on modern hardware? Emulating Mac OS 9 using QEMU is the way to go! This guide will guide you through the process of setting up Mac OS 9 in QEMU, from creating a virtual hard drive to installing the operating system. Let’s get started!

Prerequisites

Before you begin, make sure you have these things:

A computer that can run QEMU (macOS, Linux, or Windows).

A Mac OS 9 installation ISO (like Mac OS 9.2.2 Universal Install. Check Archive.org).

A version of QEMU with sound support (like qemu-screamer).

You should also know a bit about using the terminal.

Step 1: Install QEMU


Download and install a version of QEMU that supports PowerPC emulation. The qemu-screamer fork is recommended for better audio support.

Clone the repository:


git clone -b screamer https://github.com/mcayland/qemu qemu-screamer

cd qemu-screamer


Configure and compile:

./configure --target-list="ppc-softmmu" --audio-drv-list="coreaudio" --enable-libusb --enable-kvm --enable-hvf --enable-cocoa

make


The compiled binary will be located in qemu-screamer/ppc-softmmu/qemu-system-ppc.


Step 2: Create a Virtual Hard Drive

Use the qemu-img tool to create a virtual hard drive for Mac OS 9:


./qemu-img create -f qcow2 macos9.img 2G


Replace 2G with your desired size if needed. Mac OS 9 does not require much space, so 2 GB is generally sufficient.


Step 3: Prepare the Installation Media

Ensure you have a bootable ISO of Mac OS 9. If you do not have one, download it from resources like “Mac OS 9 Lives.” Place the ISO in an accessible directory on your system.

Step 4: Start QEMU and Begin Installation

Run QEMU with the following command to boot into the Mac OS 9 installer:

./qemu-system-ppc \

-L pc-bios \

-cpu g4 \

-M mac99,via=pmu \

-m 512 \

-hda macos9.img \

-cdrom "/path/to/Mac_OS_9.iso” \

-boot d \

-g 1024x768x32 \

-device usb-mouse \

-device usb-kbd


Explanation of key flags:


    -cpu g4: Emulates a G4 processor.

    -M mac99,via=pmu: Sets the machine type to emulate a PowerMac G4.

    -m 512: Allocates 512 MB of RAM.

    -hda macos9.img: Specifies the virtual hard drive.

    -cdrom: Points to your Mac OS 9 installation ISO. Have a look on archive.org for the ISO.

    -boot d: Boots from the CD-ROM.


Step 5: Initialize and Install Mac OS 9


Once QEMU boots, open “Drive Setup” from the Utilities folder.

Select the uninitialized disk and click “Initialize.”

Choose “Mac OS Extended” as the file system and proceed.

After initializing, return to the installer and follow on-screen instructions to install Mac OS 9 onto your virtual hard drive.


The installation process typically takes about 7–10 minutes.

Step 6: Boot into Mac OS 9

After installation is complete:


Shut down QEMU.

Modify the boot command to boot from the hard drive instead of the CD-ROM:

    ./qemu-system-ppc \

    -L pc-bios \

    -cpu g4 \

    -M mac99,via=pmu \

    -m 512 \

    -hda macos9.img \

    -boot c \

    -g 1024x768x32 \

    -device usb-mouse \

    -device usb-kbd


Start QEMU again, and it should boot into your newly installed Mac OS 9 environment.


Optional: Enable Audio Support

If using qemu-screamer, audio can be enabled by ensuring CoreAudio is configured during compilation (–audio-drv-list=”coreaudio”). This setup allows sound output within Mac OS 9.

Tips and Troubleshooting


Backup Your Disk Image: After installation, back up your virtual hard drive (macos9.img) to avoid reinstalling if issues arise.

Adjust RAM: While Mac OS 9 can run on as little as 40 MB of RAM, allocating at least 512 MB ensures smoother performance.

Networking: Add networking support with flags like -netdev user,id=mynet and -device sungem,netdev=mynet.


By following these steps, you’ll have a fully functional emulation of Mac OS 9 running on QEMU! Enjoy exploring this nostalgic operating system.
VMWare Workstation Pro and Fusion Pro now available for free for everyone

Back in May, VMware announced that VMware Workstation Pro and Fusion Pro would be free for non-commercial use. This was fantastic news for non-commercial users. However, a few days ago, they made an even better announcement: the free edition is now available to all users, including commercial users. While you can still purchase a license if you require support, the free version functions just as well, albeit without any support.


It appears that they are discontinuing Workstation Player and Fusion Player, as the functionality they offered is now included in the free version of Workstation and Fusion. 

ESXi on Arm (and Raspberry Pi!)

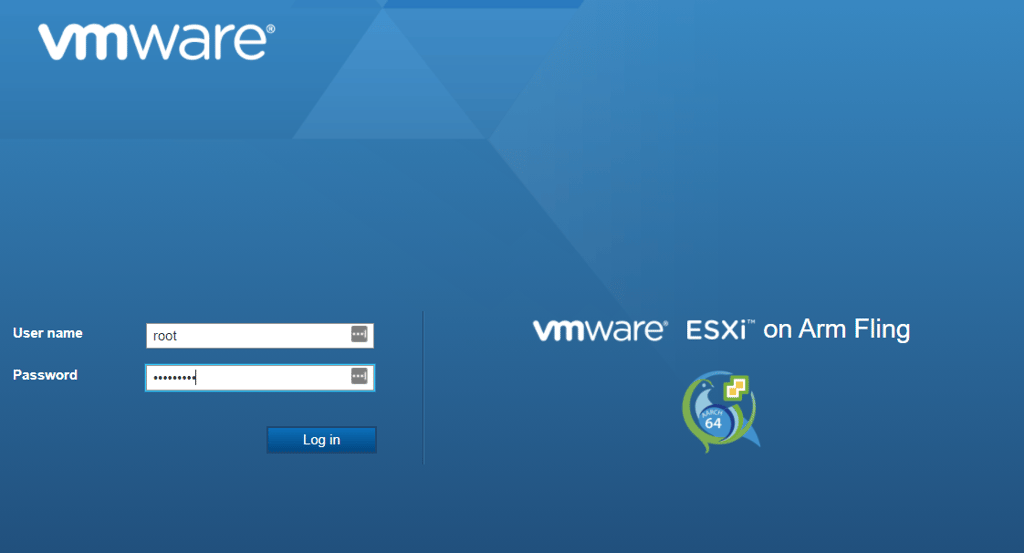
A few days back (October 6th 2020) VMWare announced a new “Fling”: ESXi Arm Edition. Not completely sure what a Fling is, but anyway, I started reading, liked the idea and managed to download a copy for testing. I have 2 Pi 4s in the house, both 4Gb Models, and I wanted to play around with the new tech.

So, after some messing with UEFI stuff, formatting Micro SD cards correctly, copying files and some limitations, I managed to get 2 new ESXi servers running on Raspberry Pi!

There is a walk though Video showing everything I did to get up and running. Its embedded below. Some of the hardware I used is also mentioned below.

Equipment list:

  • 2 x 4G Raspberry Pi 4s
  • 2 x 16Gb Micro SD Cards (you could probably get away with 1Gb cards… You only need a small 256MB partition for the UEFI stuff)
  • 2 x 64GB Kingston DataTravler USB 3 Sticks (This is where ESXi is installed, plus the rest of the storage, if configured correctly, can be used for VMs).
  • 2 X POE to USB C Splitters. I used these so I can power both Pi’s though POE and can reboot them using the switch. You could use a USB Power Adapter like the Anker PowerPort 60W which would give you 6 ports to run your Raspberry Pi’s. I would probably limit it to running 4 Pi’s though, since the Pi 4 needs a bit more power…
  • Some way of installing the ISO to the Pi. I used an iodd Mini 256Gb for the task. I also did a video review of that here.
  • About an hour of your time.

As mentioned above, the USB key is used for storing ESXi when its installed. It can also be used for storing VMs. There is a command you run when installing to partition the drive in 2: 8GB for ESXi and the rest for storage. I managed to run this correctly on one, but missed it on the second. I might reinstall that Pi and get it up and running again soon. You also have the option of installing to iSCSI. That might be useful too…

Storage wise, VMWare recommend using usb3 or fast iscsi or nfs storage for vms. I’m using nfs on my workstation which seems to work OK. but you are still limited to 1Gb/s of the Raspberry Pi. They say it is possible to use extra USB network cards. Could be interesting to try that out.

So far i have managed to install a single VM on one of the Pis. I plan on migrating from a Physical PiHole instance to a virtual one. I also plan on getting a few 8Gb Pis and see where this rabbit hole gets me. It can also be managed with VSphere. Let’s see if I can get that working… Stay tuned!

If anyone has any questions, comments, etc., just shout. And if your interested in videos like these, subscribe and like the video!

Network Update Info April 2019

So, this post has been a long time coming! A load of different things to talk about, so lets get started!

GodBox V3

So, for a long time, I have been thinking about GodBoxV3, the replacement to GodBoxV2. And when planning this, i had some ideas of what it should be:

  • Minimum of 2×16 cores (double godboxv2)
  • About the same RAM, if not more
  • FAST STORAGE!
  • Is able to run my twin 30" 4K monitors
  • Would like 10Gb/s NICs

Well, It finally happened! I got the machine, built it and, well, its impressive! How did i do with specs? Well…

All is good! Photos, more details and benchmarks coming soon… stay tuned!

Finally 10Gb/s Networking!

Since GodBoxV3 had a few 10Gb nics, i needed to upgrade the network to support it. I ended up with a Ubiquiti Networks EdgeSwitch-XG. 16 ports (12 SFP+ and 4 RJ45). The SubperMicro board has 2xRJ45 ports. Due to lack of RJ45 ports, GodBoxV3 is connected to 1, GodBoxV2 is getting a 10Gb card soon, which will be connected to 1 port, and a new Sun Microsystems server (details below) will be getting the last 2… Of the SFP+ ports, 2 are connected to the EdgeSwitch Lite, 2 to the Synology (it got a 10Gig NIC reciently too!) and 2 to the new NAS (again, more details below!)

Good bye Mikrotik, Hello EdgeRouter 4

Since i was going all Ubiquiti gear (Wifi is Unifi gear) i got rid of the old Microtik and replaced it with a Ubiquiti ER4. Happy days! Got some plans for this, more details coming soon…

Updates to BGP Stuff, including IPv6

I lost one VPS in London, but replaced it with a new one from HostUS. I still use Vultr, Packet and VServer.Site as providers too. I am also adding more and more IPv6 stuff too… There is a post on AS204994 explaining a lot of this.

New NAS and more storage!

New NAS got purchased: QNAP TS-932X. I have 5X8TB spinny disks (shucked from 5 WD My Book 8TBs) + 4 X 500GB WD Blue SSDs.

New Servers and cooling updates

Moved lots of stuff around the room… Servers run cooler, and less noisy! happy days! I also got my hands on a very nice looking Sun Server X3-2. Its a Dual Xeon E5 (currently got quad cores, going to upgrade it to 8 cores) and i think its got 16GB ram and 4x300GB SAS Disks. It also has 4X10Gb nics! ESXi will probably go on here!

VMWare in the house

Up till recently, I ran Hyper-V all round. Its still on GodBox V2 and V3 (v1 has a HDD issue, so its off…), but the main VM hosts (the C6100’s) are being migrated to VMWare ESXi… Why? Its a learning exercise… We see how it goes…

So, long update… Any questions, comments, etc… shout!

Network and HomeLab V.Next (Part 2)

So, in my last post i talked about the requirements for the home lab, and in this post, im going to talk about a few more updates i have made in the last few weeks.

First, the processors: in the first post, i talked about Xeon D or Xeon E3… Well, i missed one… The Xeon E5. I have 2 of these in GodBox 2, and you can get them into a microATX board. There does seem to be some limits with the microatx boards, but hopefully enough searching will find me what i am looking for. Ideally, i want it to take “normal” DDR3/4 memory (not SODIMMs like the ASRock one above) and also take enough of them to run 64 or 128Gb of ram (thinking 8 would do the job!). Also, i would like to have 4 GigE ports onboard and 1 management port. 4 onboard is not a hard requirement: If i can get one with 2 ports, i can always get a 4 port card for the PCI-Express slot… Finally, i would like it to have at least 6 SATA ports and possibly an MSATA port. Thinking Boot off MSATA (Windows Server 2016 Nano Server would be used), 2 SSDs and 4 HDDs. Using Storage Spaces, use the 2 SSDs as “Fast” storage for the pool.

I also think i moved off the idea of 10Gb. I like the idea of it, but given a small 10Gb switch costs upwards of a grand, and the plan is to build a machine for that price, i would prefer a fifth machine and using my existing Cisco 48 port switch and leave 10Gb as a future upgrade.

Also, changed from last time round is machine count. Originally i was saying 3-4 machines… now i am thinking 6-7… 5-6 of them should be Hyper-V boxes and the last one would be a Media Box.

I also think the Synology or SAN requirement is out… Hyper-V can be setup to do replication between hosts, and with a 4Gb link to the LAN, i think i should be OK. Also, if i have the media box separate, i should be ok there too. I will detail the media center in a later post.

So, any suggestions or thoughts on what should and shouldn’t be looked at?

Network and Homelab V.Next (Part 1)

So, its that time again… HomeLab upgrade time… Or at least the planning for it. I am in the process of rebuilding my home lab, which involves pull all old servers out of the rack and replacing them with new ones… It also means rewriting the network, possibly upgrading some existing gear and hopefully getting the whole lot done on a budget of some sort…

So, why? Well, biggest reason for all this is currently heat and power usage. We use about 4-6x more electricity than the average house here in Ireland, which means our electricity bill is fairly high. It also means that the lab, which is also my office/bedroom, gets quite warm and uncomfortable during the summer month. There is an Air-Con unit in the room, and, well, that’s costing the most on electricity!

So, what I got is a basic overview of what I want from the homelab and hopefully in the next post, I will have an idea of what it will look like..

  • 3-4 machines running a Hyper Visor (HyperV, VMWare ESXi or other). Leaning more towards Hyper-V purely because its what I got currently and its what we use in our main office.
  • each machine should be connected to at least 2 networks: one for storage and migration, one for “public” to the LAN. There may be more VLANs for other networks, but 2 is a start.
  • ideally, 10Gb connections would be nice, but multiple 1Gb connections would also work.
  • shared storage (iSCSI, SMB3, etc) would also be a nice to have, but may bump up the server count (not actually a problem) but would increase power and cooling costs. An off the shelf box, like a Synology could do the job…
  • Lower power usage and less heat produced is also a major requirement. Most of the boxes I am decommissioning are older Xeon hardware (5000 series upto a 5200 series process and even an older Xeon P4!). The newer Xeon E3 and the even newer Xeon D are a lot more efficient, use less power, produce less heat and are way faster than what I currently have. The E3 can use up to 32Gb of RAM and the Xeon D top out at 128Gb… Me being me would like more than 32Gb RAM… 🙂
  • smaller machines would also be nice. I have been looking at both Xeon D and Xeon E3 Mini-ITX boards and cases for them. I do have a half height Dell Rack, which I host these machines, and ideally, these machines should be rack mountable, but micro ATX cases could work. 2 per shelf would work grand.
  • Onboard IPMI and KVM support is something I want too… I do have a KVMoIP switch in the house, and it works, most of the time, but getting a box that has this embedded into the board would be ideal… A lot of the server boards had it as standard or allowed it to be speced, so that’s all good.
  • I am also thinking of upgrading the router to a similar spec board… Possibly a Xeon E3, or even an i5…. Ideally it should have IPMI and KVMoIP on board and should produce less heat. Biggest issues is getting enough network cards into the box…

These are my requirements at a high level overview. Over time things may change, but lets see how we get on…

PFSense with Multiple Public IPs

So, a few weeks back, i got my hands on a Hetzner Dedicated box. It has a quad core Xeon, 32Gb ram, 3x3Tb hdds, RAID controller and KVMoIP. one of the first thing i did was get myself a /29 IP pool (8 total, 6 usable IPs). There where already 3 IPs given to me: 1 for the KVM, one for the box itself, and 1 as the router for the IP block.

So, i need to setup my own router, so i picked PFSense since its what i run in house. I gave it 2 network connections: 1 connected to the main network adapter on the VMWare ESXi box (public) and one to a virtual switch, which is only used by VMs. The public is the WAN link and it gets a static IP from Hetzner, and the virtual switch is then my “LAN” link. This allows me to have standard NATed network connections to any VM i have, but then, what do i do with those IPs?

So, after a lot of digging, i found the answer. So, this should help.

  • Under firewall, click on Virtual IPs.
  • Click the plus. I then selected IP alias, selected the WAN interface and set the IP to my first public IP i wanted to give. in my case, i was given a /29 block, and my first address was 176. This is the network address. I used 177. Likewise, my last address is 183, but that cannot be used either as its a broadcast address. give it a description and then hit OK. Repease for all IPs you want to use. TIP: Give each a meaningful description!
  • Next, click firewall, NAT and 1:1. Click the add button and select your interface as WAN. set the External Subnet IP as the one you want to use and your internal IP as the machine that will have it. Thats all i did on that screen…
  • Then go to Firewall, NAT, outbound… this is where things got complicated. Set the mode to “Manual outbound NAT rule generation (AON – Advanced Outbound NAT)” and click save.
  • Then create a new rule: Interface: WAN, Source, Network, IP of the internal machine and then under translation, under address select the IP you want to give it. If you followed my tip in step 2, you should see the descriptions in here.

After saving everything and reloading the firewall, visiting a page like WhatsMyIP or ICanHazIP should show you your public IP. You can then create firewall rules to allow access. Quick idea would be:

Firewall/Rules, Add, Interface WAN, Destination: Local IP you want to use, and give whatever “normal” rules you would (HTTP, lock down to source address, etc). Click apply and hitting that address using what ever method (SSH, HTTP, etc) should work.

YMMV, but hopefully this helps! Any questions, leave a comment.

Quick tip for internet facing ESXi servers

Quick tip for all you with internet facing VMWare ESXi Hosts. I
have just got my hands on a box on the Hetzner network (more on
that later) and using their LARA system i installed ESXi on it. All was good, then I tried login in a couple hours later and i kept getting errors about my password being wrong… So, i tried a few more times, got pissed off and rebooted the box (had to do a hard reboot, since i couldn’t even get in over KVM). I though this was a hardware issue, or a config issue, and left it… yesterday, i had the console open most of the day, and when looking at something i noticed this:

Well, that’s why I couldn’t login! So, tip: create a second user account, name it something other than root, give it a secure password and use that to login to your ESXi box. Ideally, your ESXi box should be behind a firewall, but in the case of a dedicated server, that may not be financially feasible… Hope this helps someone!

ZFS iSCSI NFS SFTP Hyper-V and more

As part of my new task to make my files safer and backups faster, and, well, cheap, I am looking into ZFS for my storage needs. My needs are as follows:

  • Allow me to store lots of different types of data (Photos, Videos, Music, VMs) in different formats (RAW and JPG photos, MP4, AVI and DivX Videos, with DVD and BluRay rips also a posibility, MP3 music and VHD files from HyperV, inclduing ISOs and Snapshots). I also need to store different file systems using iSCSI (Mac and Windows clients will be mounting the storage).
  • must be safe. DO NOT LOSE DATA!
  • must be somewhat fast. I have VHDs weighing in at 100Gb… my photo collection is 600Gb. If i need to move or copy files to the storage system, it must be fast.

So, ZFS offers all these features. I can export a file share as iSCSI, NFS, SMB, etc. All works well. But the replication stuff is the interesting part…

The plan, which i am working on, is as follows:

  • have 2 machines setup: one in house and one in a datacenter (I have a dedicated box in the Hetzner data center). both could be VMs (the one in the datacenter will more than likley be a VM).
  • use the storage on the local system for whatever i need backed up.
  • have a script which will take a snapshot of a given pool every 4 hours or so…
  • that script should also dump the snapshot to a temporary location on the machine using ZFS send.
  • that file should be checked, compressed, broken up into little bits and checked again… checking is important!
  • take those little bits and send them to the datacenter, which will do lots more checking and import the files into the ZFS pool over there…
  • there may even be a two way system to send from the datacenter back to the house…
  • finally, the remote pool should be dumped to an SFTP backup system that Hetzner give me… Currently set at 100Gb, but can be increesed as needed…

Thats the “plan”… Lets see how it actually works out…

Anyway, parts of the process i need to tweak:

  • uploading and using as much of my upload bandwidth as possible (2x10mb upload connections…) if i am backing up 800Gb, which should be my first backup, i would like to use both pipes to the fullest… on a single connection, at 50% capacity, it would take 15.1 days to upload. if i can get both connections to work at 80% capacity, giving me 16Mbits/s, it would be down to 4.7 days. With compression and Deduplication, i can probably bring that down a bit more…
  • backing up to SFTP… Reading different things is telling me this might not be such a good idea…

Some links which you might find useful:

Understanding Storage Spaces in Windows 8 and Windows Server 2012

So, Windows Server 2012 and Windows 8 have both RTMed in the last couple of weeks and will be available to the public in the next month or so (September for Server, October for Client). If you are an MSDN Subscriber, you already have Client, and will (hopefully) get server in the next couple of weeks… Fingers crossed… Anyway, one of the interesting features i am waiting for is Storage Spaces Tim Anderson’s Gadget Writing blog has some information on how Storage Spaces works. handy notes on what to do and what not to do.