How to use Cloudflare Warp with a UDM Pro
If you’re considering using Cloudflare Wrap for specific machines on your network, you can easily install the Warp client directly on them. It supports various operating systems, including Windows, Linux, Mac, iOS, and Android. However, if you need to use it on devices that aren’t compatible with the client installation, for example, NAS Devices or Smart TVs, this tutorial may be helpful.
First, please note that this is not an officially supported option. Cloudflare might modify their configurations at some point, potentially causing this feature to break. You have been informed about this possibility.
What do you need:
- UDM Pro (it can work on any Ubiquiti Unifi gateways, but this is the one I have).
- Wireguard Configuration File Generator (WGCF). This tool will generate a Wireguard configuration file based on the Cloudflare settings.
- I’ve created a script that executes the following commands. It worked on my MacBook Pro, and it should also work on Windows or Linux.
First, install WGCF. I installed it by running
brew install wgcf
on my Mac Book Pro.
Next, run:
wgcf register
This will register a client on your machine. A wgcf-account.toml file will be left in your running folder. Next, run the script again.
wgcf generate
You’ll be left with a wgcf-profile.config file in your running folder. Open this file in a text editor to access the necessary details for your next steps.
Go to your Unifi Network Dashboard, click on “Settings,” and then select “VPN” and “VPN Client.” Click on “Create New” and choose “Wireguard” as the protocol. Then, change the “Setup” to “Manual.”

The configuration file you created earlier should resemble this:
[Interface]
PrivateKey = <PRIVATEKEY>
Address = <IPv4Address>, <IPV6Address>
DNS = 1.1.1.1, 1.0.0.1, 2606:4700:4700::1111, 2606:4700:4700::1001
MTU = 1280
[Peer]
PublicKey = <ServerPublicKey>
AllowedIPs = 0.0.0.0/0, ::/0
Endpoint = <ServerEndpoint>
Use the contents of PrivateKey to overwrite the existing Private Key. This will automatically fill in your Public Key. Next, set your Tunnel IP to the value listed for IPv4Address. Remove the trailing slash and use that in the Netmask (my Netmask was a /32). Server Address is the value listed as ServerEndpoint. Check the port and include it as well. The Public Server Key is ServerPublicKey. Finally, add your DNS settings for IPv4 in the configuration and click Apply Changes.
After a few seconds, the status should change to “Connected”.

Next, you need to configure the Policy-Based Routes. This is located under the routing section, specifically under the heading “Policy-Based Routes.”
Here, you can name the rule and decide whether you want to send all traffic or specific traffic.
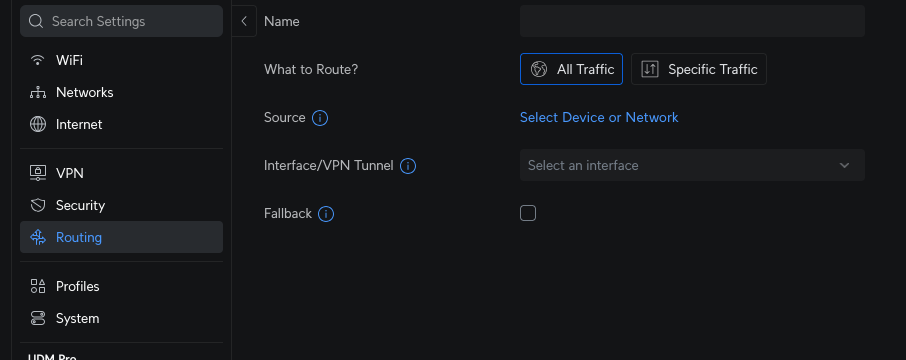
For all traffic, you can select a specific device or the entire network. For instance, in this example, all traffic from my Guest network will be routed through Warp:

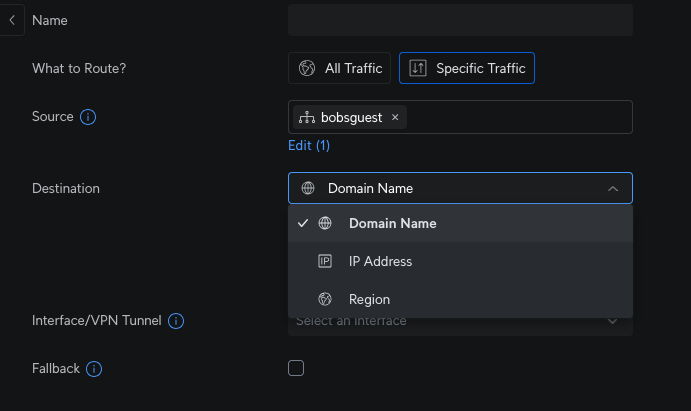
You can also set it to send traffic to specific destinations:
Fallback allows it to fail back to one of the other connections if the Warp connection fails.
Finally, click Add Entry at the bottom. Now, run some tests on that machine and see the traffic counts increase.
That is now it. You can select what devices or networks, or even what destinations you want to send over Cloudflare. Happy hunting.
---
This site is hosted on my own ASN on AS204994. More details about that over there. I also use Vultr for transit services and HostUs for LIR Services. Check them out. You can also check some of the gear I use on a daily basis over on kit.co/tiernano. Looking for a Backup Option? Check out Backblaze and get a month free.